
Dashboard Navigation: Income and Taxes > Direct Deposit
or
Menu Navigation: Employee Actions > Income and Taxes > Direct Deposit
Note: This example uses portal images as seen on a computer. Portal images appear differently on a tablet or smartphone, but the steps remain the same.
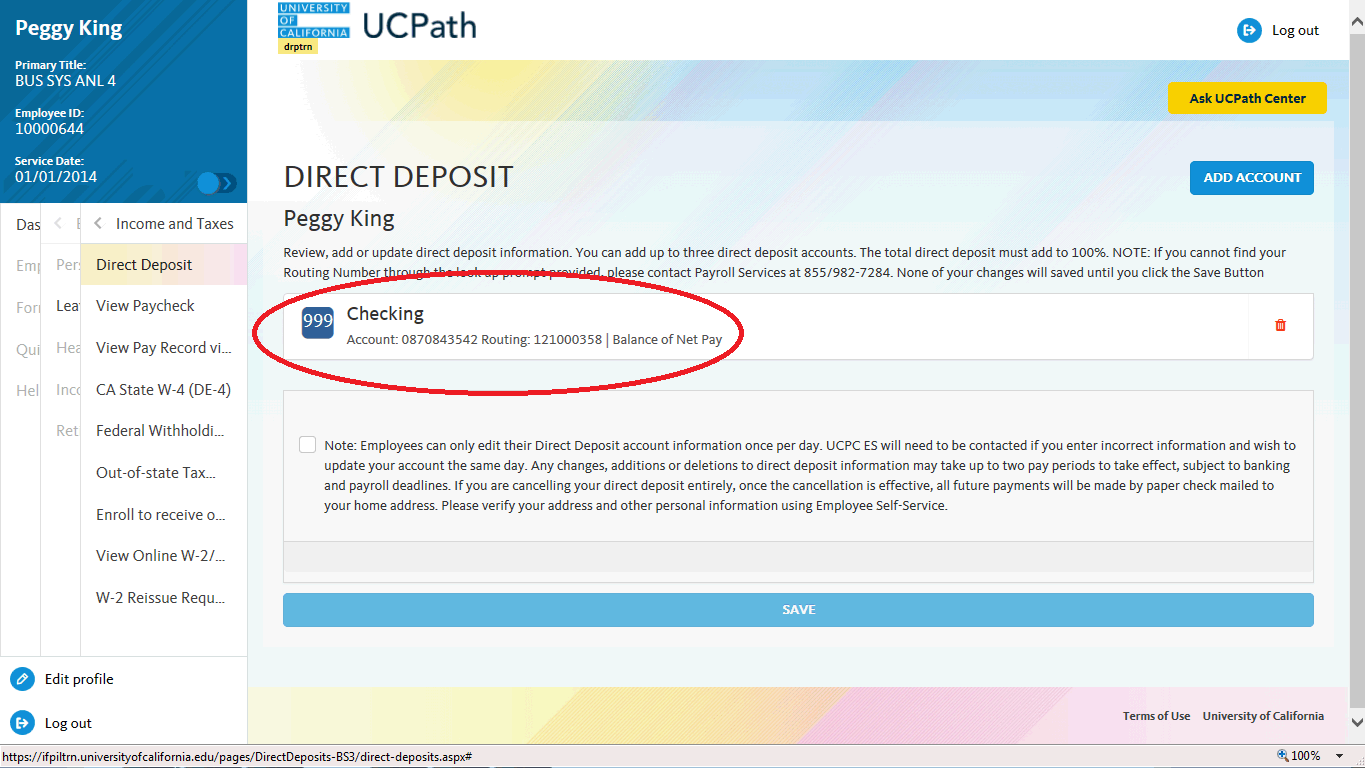
Step 1: The Direct Deposit page displays all of your direct deposits.
In this example, change the bank account on your direct deposit checking account.
Click the Direct Deposit Account link.
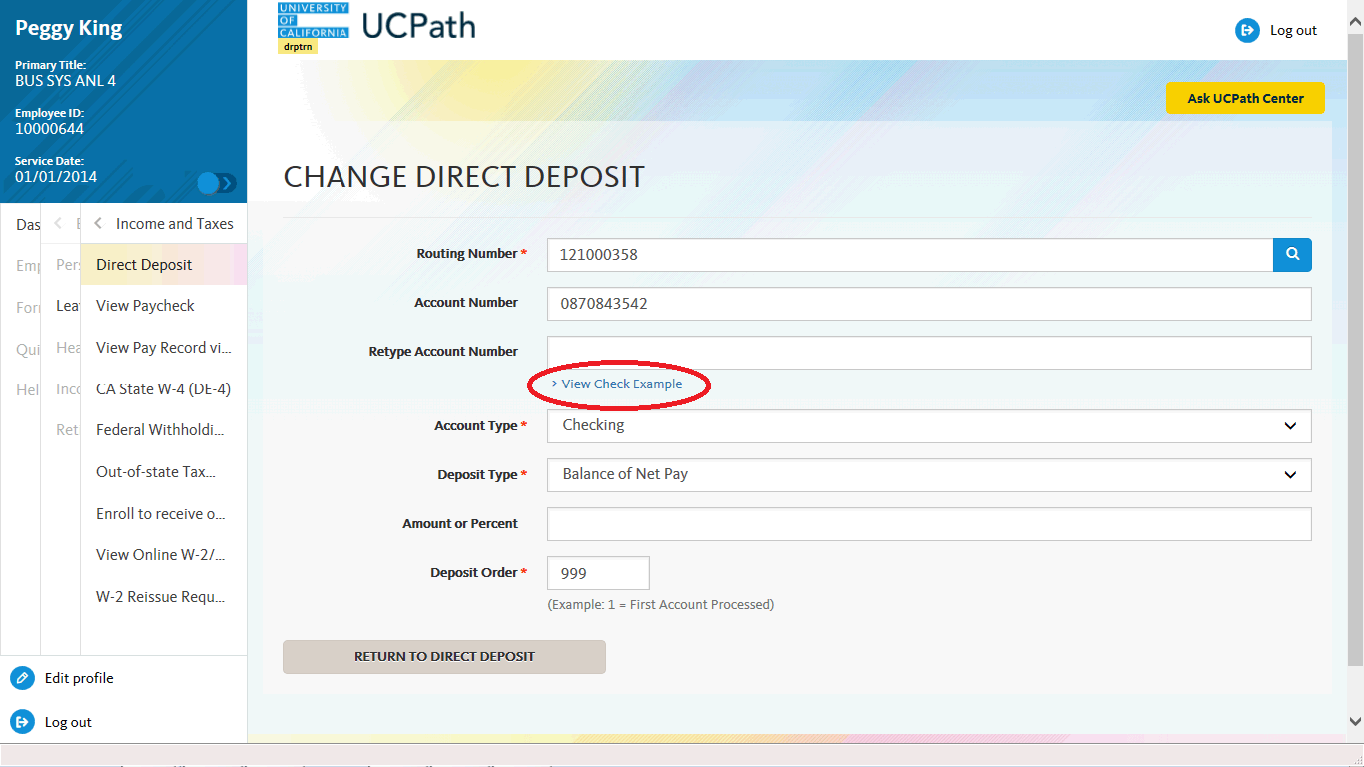
Step 2: To help locate the Routing Number and Account Number on your check, click the View Check Example link.

Step 3: After reviewing the check example, click the View Check Example link to close the example.
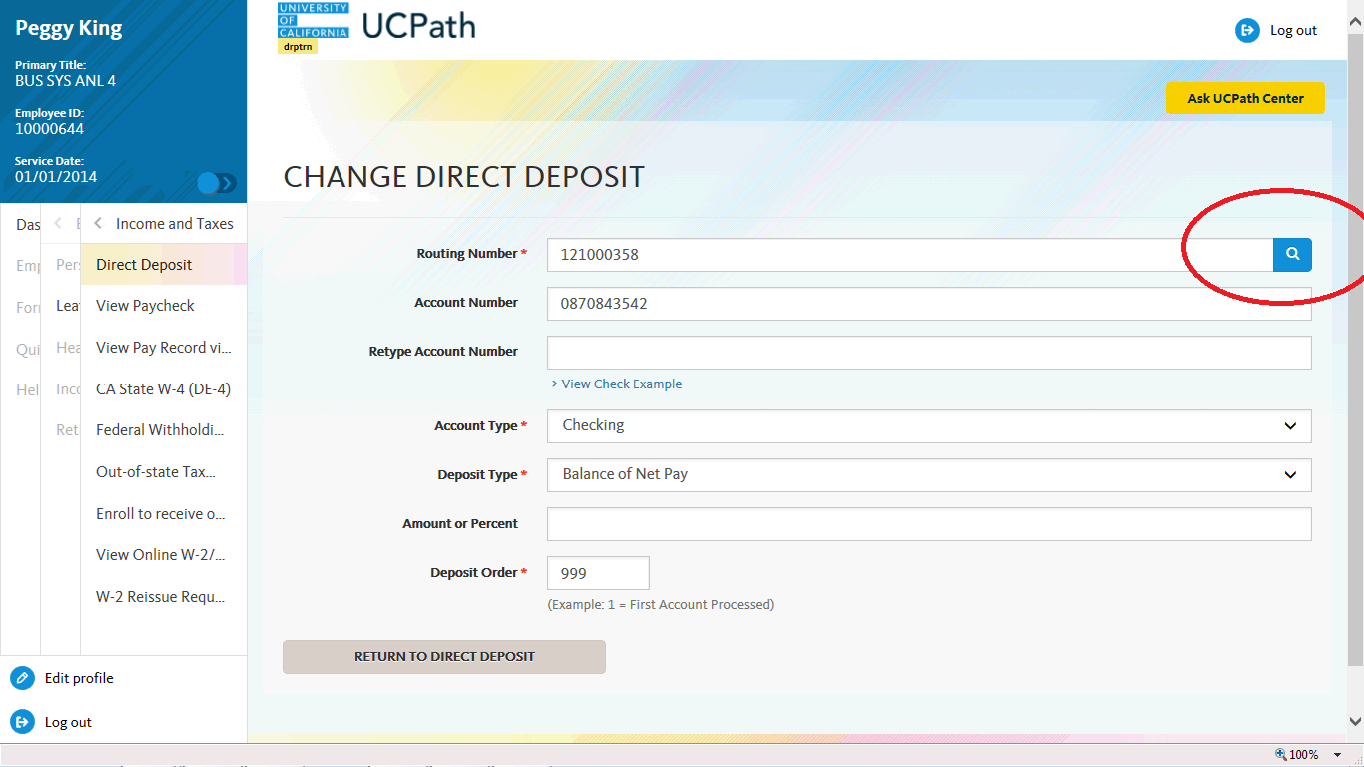
Step 4: Use the Routing Number field to update the bank routing number details.
Click the Routing Number button.

Step 5: A list of known routing numbers is available in the system.
Click in the begins with field.
Step 6: Enter the desired information into the begins with field. For this example, enter part of the routing number, enter 121042.
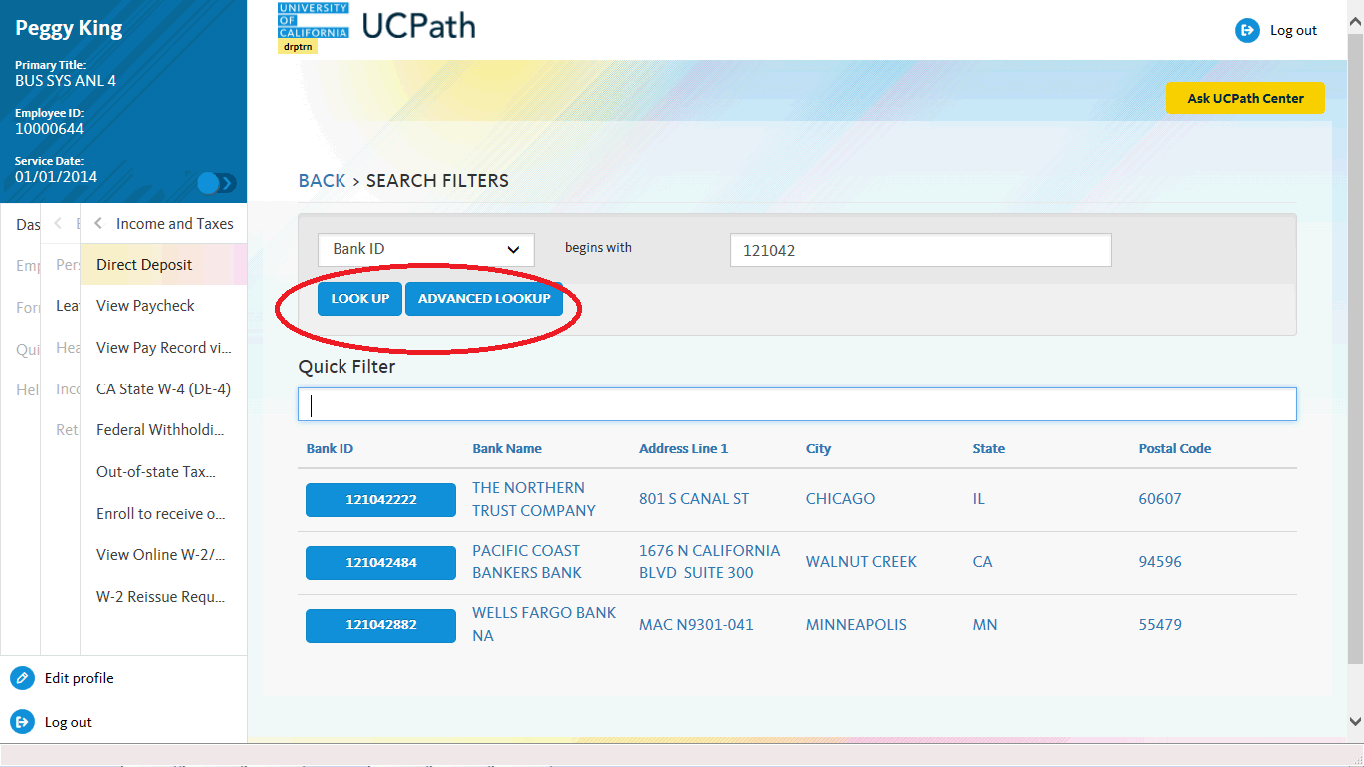
Step 7: Click the Look Up buttton.
Step 8: In this example, find the Wells Fargo Bank. Click the 121042882 button.

Step 9: Click in the Account Number field.
Step 10: Press [Delete].
Step 11: Enter the new account number in the Account Number field. For this example, enter 9871234654. 12. Click in the Retype Account Number field.
Step 13: Re-enter your new account number in the Retype Account Number field. For this example, enter 9871234654.
Step 14: If you are changing your account type, click the button to the right of the Account Type field and select a different account type. In this example, the account type is not changing.
Step 15: Click the button to the right of the Deposit Type field.
Step 16: Select one of the following options:
Amount: Use this option if you want to specify a fixed dollar amount to be deposited to the bank account.
Balance of Net Pay: Use this option if you want the remaining net pay amount (after all other deposit types have been distributed) deposited to the bank account.
Percent: Use this option if you want to specify a percentage of pay to be deposited to the bank account.
For this example, click the Balance of Net Pay list item.
Step 17: If you select the Deposit Type of either Amount or Percent, you must enter the appropriate value in the Amount or Percent field.
Step 18: The Deposit Order field indicates the order in which pay is distributed to bank accounts if you have multiple direct deposit accounts. The lower the number, the higher the priority. Balance of net pay accounts should have the highest deposit order of 999.
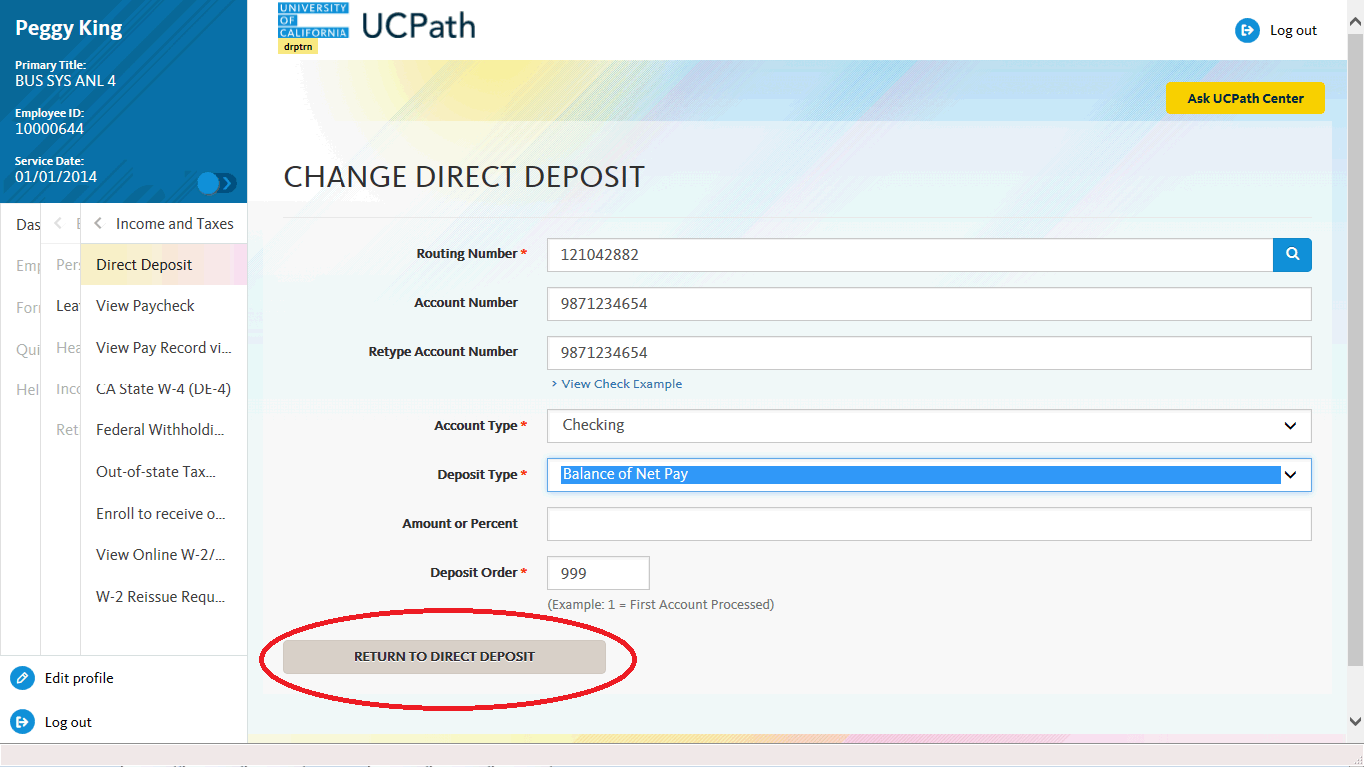
Step 19: Click the Return to Direct Deposit button.
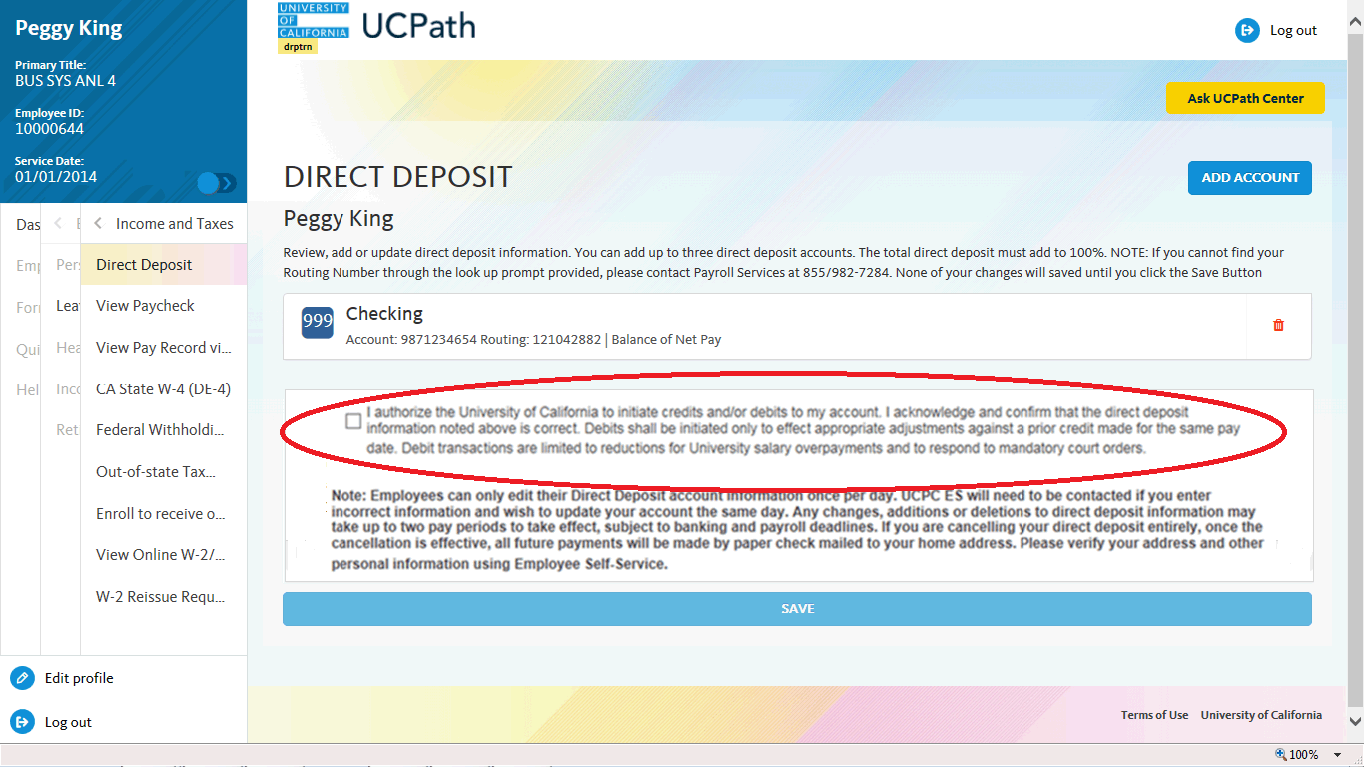
Step 20: You can add/update your direct deposit only once per day. Make all direct deposit changes, deletions and additions before you save.
Click the check box to allow UC to credit and/or debit your account(s).
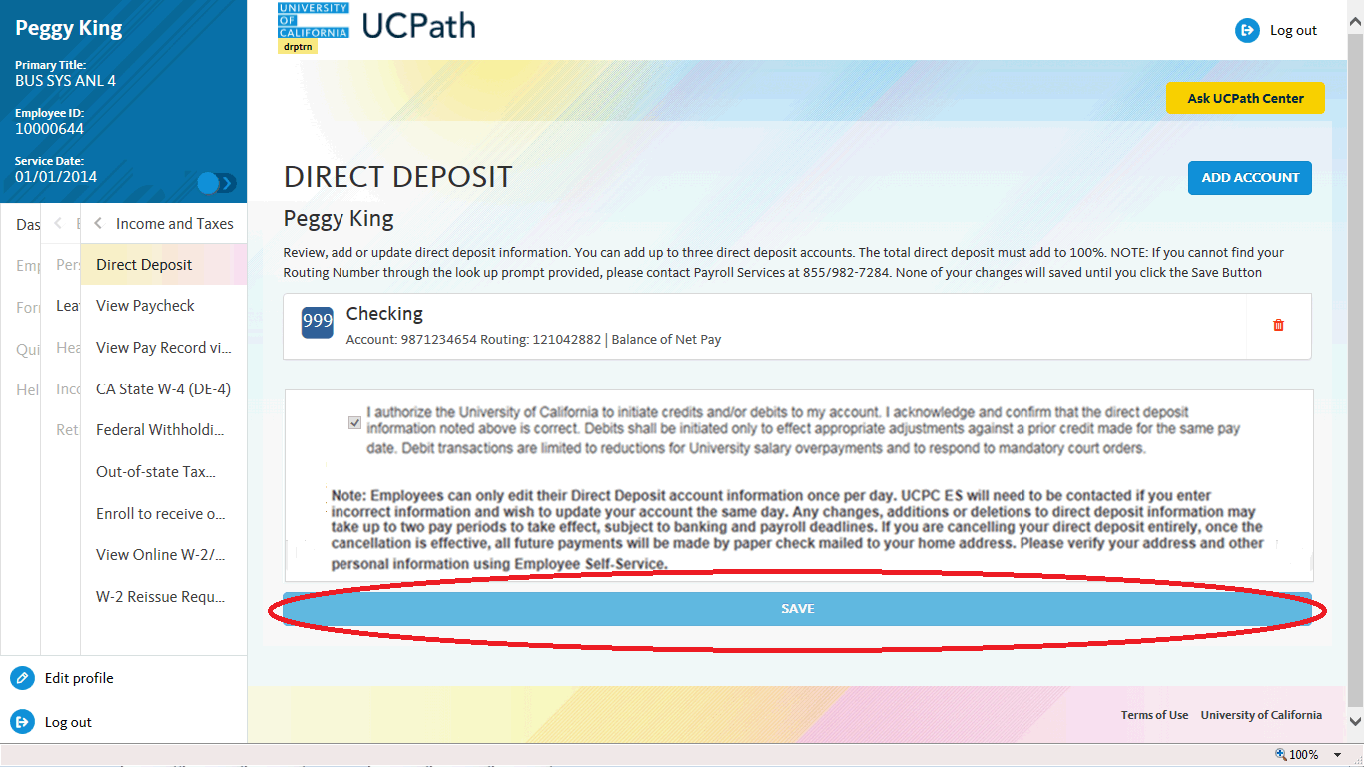
Step 21: Click the Save button.
Step 22: You have updated your direct deposit information in the UCPath Portal. End of Procedure.